SHANE RESTAURANT

SHANE RESTAURANT

Stages of implementation and

SHANE RESTAURANT

Stages of implementation and design of the “SHANE” restaurant project:

1. Planning:

At this stage, the project vision and objectives are defined. This includes:

Determine the type of restaurant and the general concept (for example, fast food, seafood, etc.).

An economic feasibility study for the project that includes design and implementation costs.

2. Restaurant Design:

At this stage, the interior and exterior design of the restaurant is determined. This includes:

Choosing the appropriate colors and materials for interior and exterior decoration, taking into account that they are commensurate with the concept of the restaurant and attract customers.

Designing and distributing tables and chairs in a way that contributes to the comfort of customers and accommodating the largest possible number.

Designing the restaurant kitchen in a way that allows for a smooth workflow according to the cooking and preparation processes.

Choosing designs and styles for restaurant signage and logo.

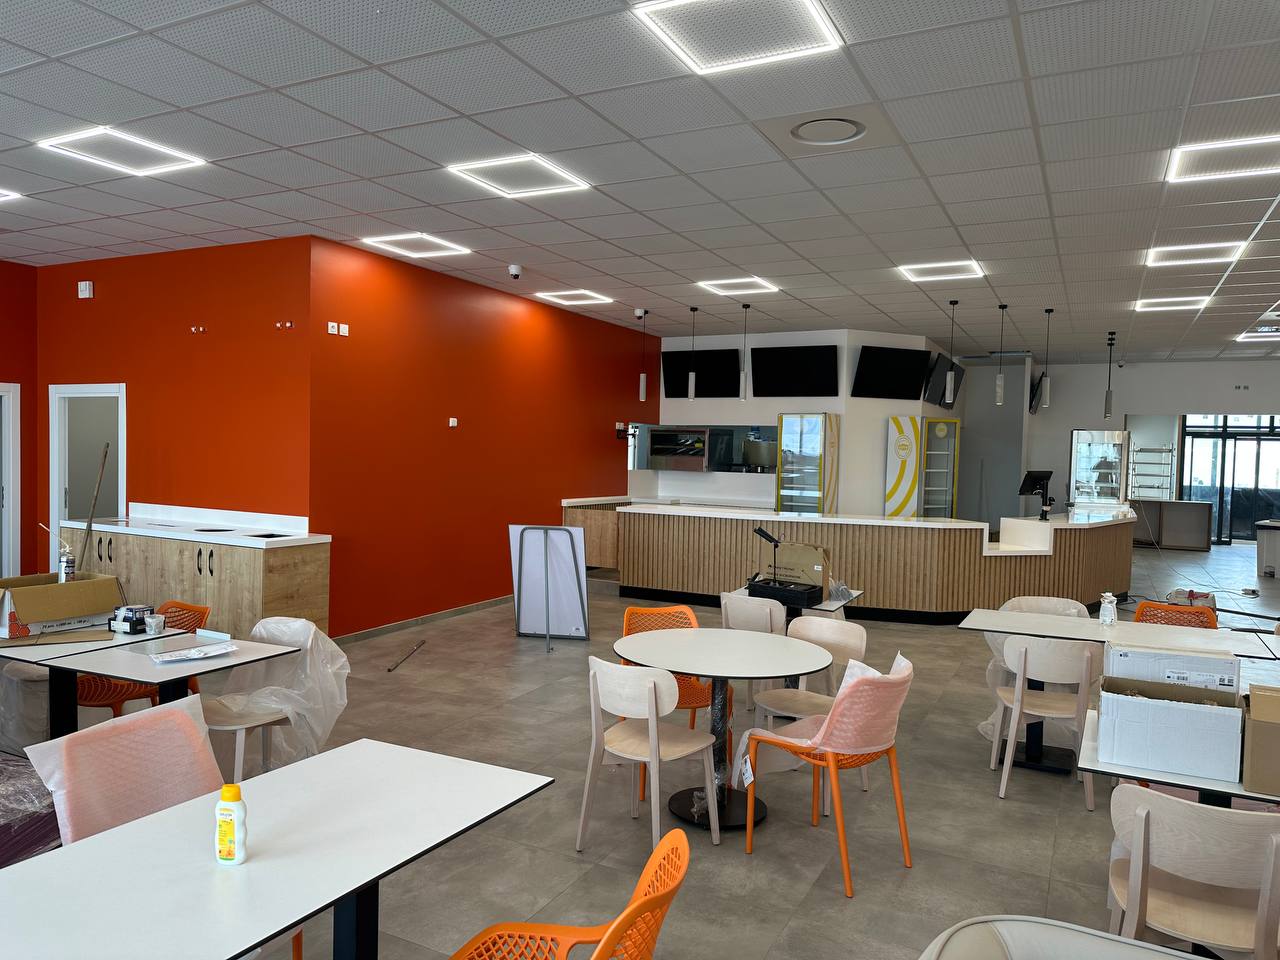
3. Preparing and equipping the place:

This stage includes converting actual designs and plans into reality:

Build and arrange the restaurant according to the designs and layouts.

Preparing kitchen equipment, furniture, decorations and everything needed to start work.

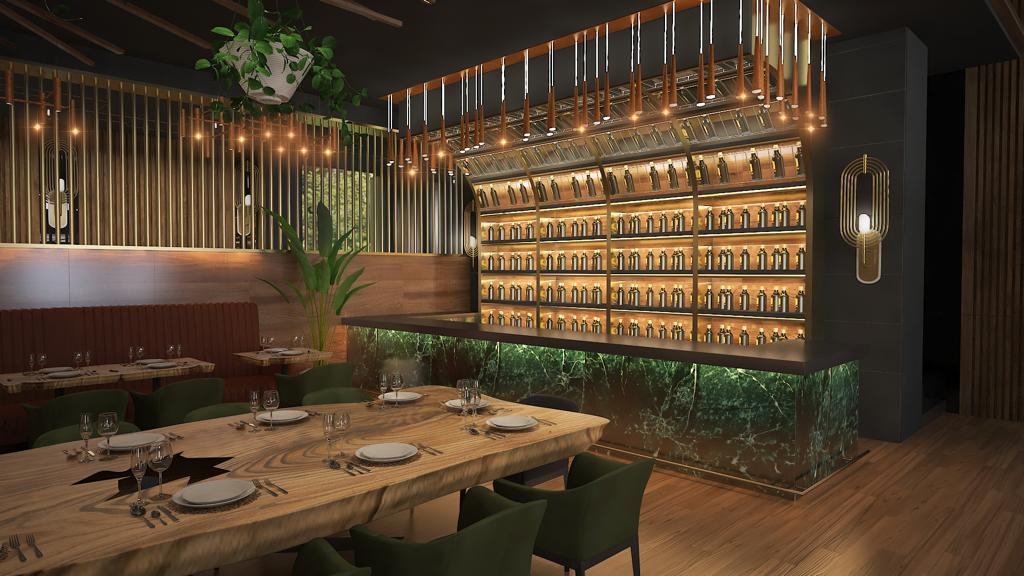
4. Lighting and Decoration:

Lighting and decoration play an important role in giving the restaurant a distinctive character and creating a suitable atmosphere for customers, so we have done the following:

Choosing suitable lighting that matches the decor and contributes to creating a comfortable and attractive atmosphere.

Using soft and gentle lighting to avoid stressing customers.

Integration of direct and indirect lighting to create a different atmosphere in different areas of the restaurant.

Use distinctive decorations, wall paintings or artistic elements to give the place a unique touch.

5. Evaluation and Development:

After a period of start-up, the time comes for continuous evaluation and improvement of the project:

Gather customer feedback and ratings in order to identify successes, challenges and areas for improvement.

Develop plans for future improvements, both in terms of service and decor.

6. Innovation and development:

As developments in the restaurant industry continue, opportunities for innovation and expansion can be seized:

Conclusion:

These are the implementation and design stages of the “SHANE” restaurant project from planning to operation. Keep in mind that these phases may vary slightly depending on the overall project model and local and time requirements. Lighting and decoration can play a big role in highlighting the identity of the restaurant and making it a welcoming and attractive place for customers.

Bookcase

Bookcase

Designing a wooden bookcase

8 oak steak hause geneva

Bookcase

Designing a wooden bookcase decoration for books To collect it in an organized manner, here I will present to you the steps that we implemented to design the bookcase decoration:

1. Planning and Design:
Space Measurement: We accurately measured the space of the room to determine the available closet space.

Choosing a location: We chose a suitable place for the cabinet.

Cabinet Design: We start to design the cabinet according to the customer’s needs. Shelves for storing books.

2. Choice of materials and colors:
Wood selection: We chose the right type of wood for the cabinet.

Color selection: We chose the color that matches the room’s decor, according to the customer’s opinion.

3. Building the treasury:
Wood cutting: We started by cutting the wood pieces according to the dimensions specified in the engineer’s design using the appropriate measuring and cutting tools.

Assembly: We put the parts together using the right tools. We made sure it was installed securely and according to the drawn design.

4. Installation and installation:
Cabinet installation: We installed the cabinet in the specified location in the room using the appropriate screws and anchors.
5. Finishing and Decoration:
Wood polishing: We polish it using suitable materials to give the wood a luster and protect it.

6. Testing and Verification:
We turned the lights on and off to make sure they were working fine.
These are the steps we took to design an office cabinet decor. You can call us to schedule an appointment and request your own locker.

Glasses shop decoration

Glasses shop decoration

Executing the decoration of

Glasses shop decoration

Executing the decoration of a store that sells medical glasses in France:

1. Planning and Research:
Before starting anything, we must do a comprehensive research on the needs and trends of the local market in France for eyeglasses. Are there particular trends in design? What are customer preferences?
2. Decoration Design:
We selected an interior design that expresses the identity of the store and attracts customers. In collaboration with the interior designer to achieve this.
We chose a color palette that matches the overall style of the shop and reflects the classy and professional atmosphere.
We decided to distribute the spaces effectively, such as the glasses display area and the consulting area.
3. Selection of Materials and Furniture:
We chose materials that suit a sophisticated and professional atmosphere, such as fine wood and high-quality glass.
Choose appropriate furniture for presentation and consultation areas, such as tables and chairs.
4. Lighting:
Lighting plays an important role in enhancing the atmosphere and displaying glasses attractively. We chose different types of lighting, such as direct lighting and soft lighting.
We used lighting to highlight key spectacles or specials.
5. Shop preparation:
After designing the decoration, we equipped the shop with the required furniture and equipment.
We arranged the exhibition areas harmoniously and according to the specified design.
6. Decoration and Final Details:
We added finishing touches to the decor, such as fresh flowers and appropriate paintings.
We made sure that all the details reflect the desired identity of the shop.
7. Performance Review:
After a period of time, we reviewed the shop’s performance and met customers’ needs.
8. Continuous Development:
We continue to think of ways to improve the future designs of the stores and renew the decor designs regularly to maintain attractiveness and freshness.
These are the general steps to implement the decoration of the eyeglasses store that we have completed. Remember that every niche is different, so it is important that the steps depend on the specific context and goals of your project.

Bathroom cabinet decoration

Bathroom cabinet decoration

Wooden bathroom cabinet decor

riçkess Lyon

Bathroom cabinet decoration

Wooden bathroom cabinet decor design to improve the look and function of the bathroom. Here I will give you steps that we implemented to design bathroom wooden cabinet decoration:

1. Planning and Design:
Space Measurement: We accurately measured the bathroom space to determine the available cabinet space.

Location selection: We selected a suitable place for the cabinet inside the bathroom, such as above the wash basin and next to the shower.

Cabinet design: We started designing the cabinet according to the client’s needs. From shelves and drawers for storing cosmetics and additional drawers.

2. Choice of materials and colors:
Wood selection: We chose a suitable type of wood for the cabinet. Moisture-treated wood is suitable for the bathroom.

Color selection: We selected the color that matches the bathroom décor, according to the customer’s opinion.

3. Building the treasury:
Wood Cutting: We started by cutting the wood pieces according to the dimensions specified in the engineer design using suitable measuring and cutting tools.

Assembly: We put the parts together using the right tools. We made sure it was installed securely and according to the design drawn.

4. Installation and installation:
Installing the cabinet: We installed the cabinet in the specified location in the bathroom using the appropriate screws and anchors.
5. Finishing and Decoration:
Wood Polish: We polish it using suitable materials to give the wood a shine and protect it.

Add handles or doors: We installed door handles.

6. Testing and Verification:
We opened and closed the cabinet to make sure that the doors and drawers are working properly.
These are the steps we took to design a bathroom wooden cabinet decor. You can contact us for an appointment.

PENTHOUSE

PENTHOUSE

If you want to

PENTHOUSE

If you want to implement a wall cabinet on the shed of your home, then you are in the right place, you should keep in mind that these instructions are based on general information and may need modifications depending on your circumstances.

1. Planning and Design:
We locate the wall cabinet in the shed. We selected a suitable location and then accurately measured the space available.

Cabinet Design: We drew a plan for the design of the wall cabinet. Determining the number of shelves, dimensions and materials that we will use.

2. Purchase of materials and tools:
We have purchased the wood and other materials that we will need to build the cabinet.
3. Construction:
We cut the materials according to the dimensions specified in the engineer’s design using the appropriate tools.

Assembly: We started by assembling the parts together and fitting them securely keeping the shelves even and level.

4. Composition:
Installing the Cabinet: We installed the cabinet on the shed of the house using appropriate anchors and made sure it was well secured and could bear the planned weight.
5.Add details:
Adding additional details such as door handles and additional lights specified within the design.

6. Verification and Testing:
Installation Verification: We made sure that the cabinet is installed securely and there are no installation issues.

The Test: We opened and closed the doors and drawers to make sure they were working properly.

Remember that the steps may differ from one house to another, you can contact us to schedule an appointment.